Craft Room Makeover

Many of you would have followed the posts about my craft room makeover on my facebook page and now you can see what I did with some of the photos.
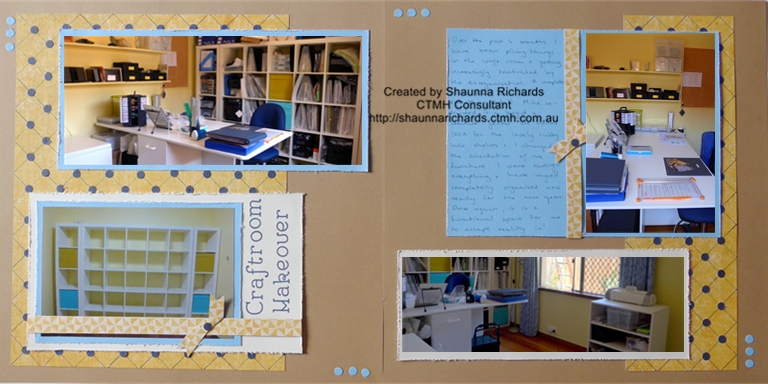 I created my own background paper with a pen and a hole punch! Begin with a full sheet of 12"x12" paper in a plain or subtle pattern. When you lay this on your Versmat (Z1279) you can still see the measurements and markings around the paper. Use the Ruler (Z1471) and a pigment ink pen to draw diagonal lines across the page. Start in a corner going from 1" to 1" and work towards the centre. Do the same from the opposite corner and then you can rule the final central lines (which are longer than the ruler) by matching the grid lines on the ruler to previously drawn lines. Turn the paper 90º and draw another set of lines to create the diagonal grid shown above.

Using a standard hole punch create lots of dots to glue over each line intersection. I used Bonding Memories Glue (Z553) and a pair of tweezers for this job. HINT: trim paper to fit your layout and place on page along with photo mounts BEFORE adding the dots and then you don't need so many. I distressed the edges of my photo mounts to add a bit of texture.

A final touch was the paper ribbons. These were just 1/2" strips of paper with a short segment dovetailed and twisted to create the bow.

This technique could be adapted by increasing the spacing between lines and using larger shapes over the joins or by substituting strips of paper for pen to create the lines.
Happy scrapping!
Shaunna
 I created my own background paper with a pen and a hole punch! Begin with a full sheet of 12"x12" paper in a plain or subtle pattern. When you lay this on your Versmat (Z1279) you can still see the measurements and markings around the paper. Use the Ruler (Z1471) and a pigment ink pen to draw diagonal lines across the page. Start in a corner going from 1" to 1" and work towards the centre. Do the same from the opposite corner and then you can rule the final central lines (which are longer than the ruler) by matching the grid lines on the ruler to previously drawn lines. Turn the paper 90º and draw another set of lines to create the diagonal grid shown above.
Using a standard hole punch create lots of dots to glue over each line intersection. I used Bonding Memories Glue (Z553) and a pair of tweezers for this job. HINT: trim paper to fit your layout and place on page along with photo mounts BEFORE adding the dots and then you don't need so many. I distressed the edges of my photo mounts to add a bit of texture.

A final touch was the paper ribbons. These were just 1/2" strips of paper with a short segment dovetailed and twisted to create the bow.

This technique could be adapted by increasing the spacing between lines and using larger shapes over the joins or by substituting strips of paper for pen to create the lines.
Happy scrapping!
Shaunna
Categories
- Album Planning (1)
- Albums (7)
- Cards (61)
- Craft with Heart (3)
- Flip Flaps (11)
- Organise Your Photos (3)
- Organisers (3)
- Paper Craft (11)
- Paper Fundamentals (17)
- Photo Organisation (1)
- PML (4)
- Scrapbook Layouts (239)
- Simple pages (2)
- Special Offers (39)
- Stamping (106)
- Stamp of the Month (90)
- stickers (6)
- Storytelling (6)
- Thin Cuts (49)
- Tools (16)
- VIP (2)
- Washi Tape (8)
- Watercolour paints (2)
- watercolour pencils (2)
- Workshops (3)
- Workshops Your Way (34)
- Shimmer Brush (1)
- Glitter Paper (1)
- Paper Candy (2)
- Interactive Cards (1)
- Metallic Markers (1)
- Tell Your Story (2)
- Distress Oxides (2)
- Nearly Bare Pages (1)
- Wedding (2)
- Stencils (1)
- Love (1)
- Beach (1)
- Fast Fun or Fancy layouts (1)
- Summer (1)
- Scrapbook workshops (2)
- Free download (2)
- Organisation (1)
- Same but Different (1)
6 comments
Leave a comment