2014 Title Page

As a kid I just loved the start of a new year. One of the best bits was making title pages in all my school books! I know, "Nerd alert". I always make a title page for my photo albums too and was keen to experiment with a stamping technique I've seen about the place.

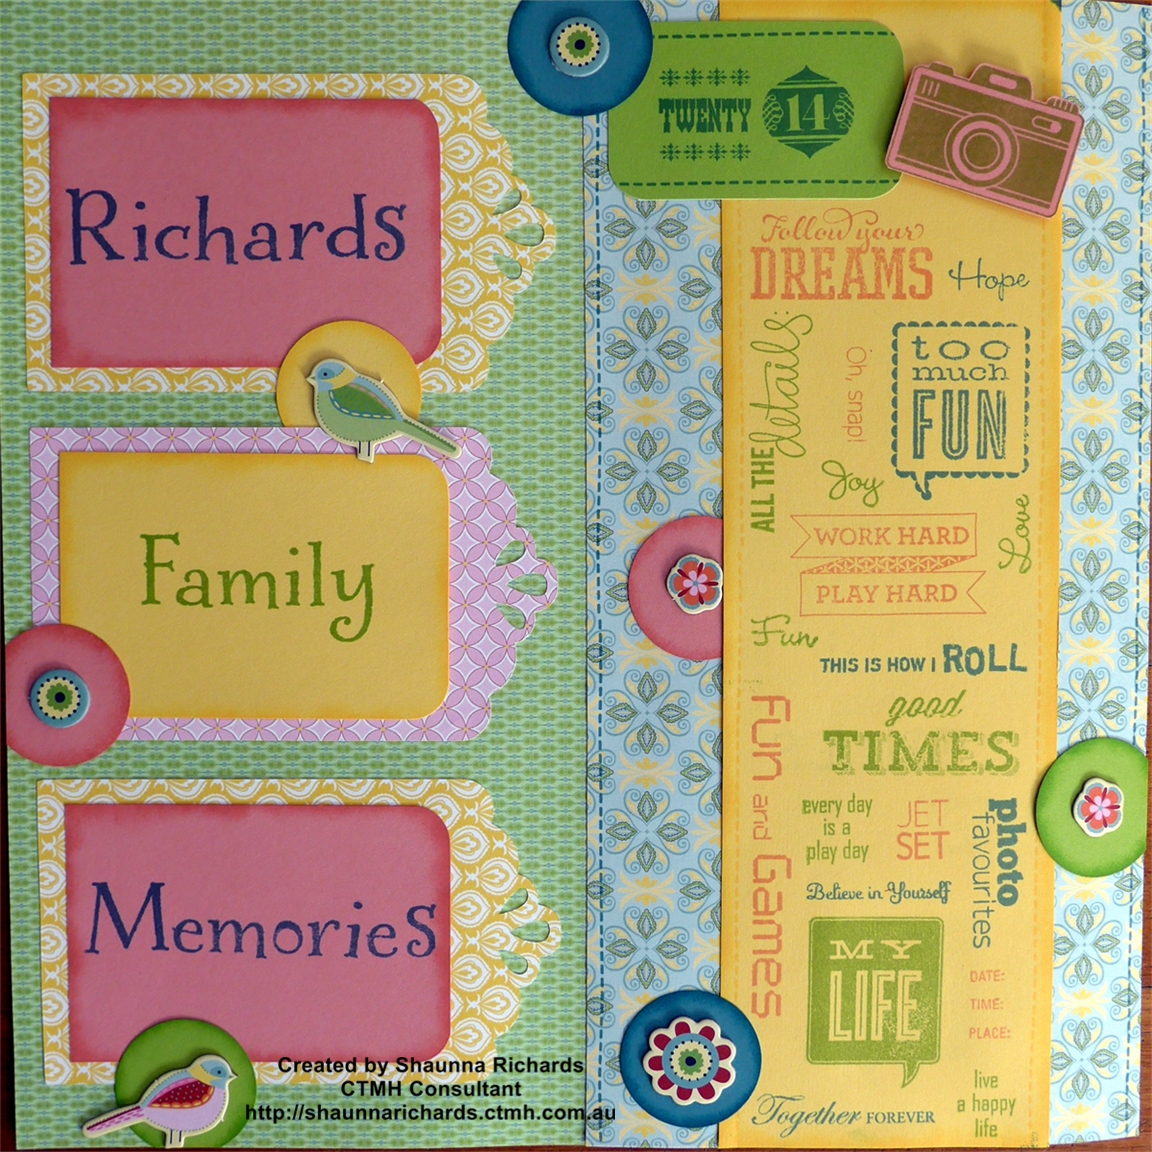
This layout is taken from the Half & Half tags design on page 86 of Reflections How To book. I love the ideas in this book - the basic designs are very simple and you can dress them up anyway you desire. My sponge daubers got a work out on all the plain cardstock elements of the page. I just love the soft edge this creates. The final touch was some faux stitching created with ink and the Stitch Wonder Stamp Set (C1564)
The tags on the left were cut using the Artbooking Cricut cartridge and Glamour Uppercase (D1537) & Glamour Lowercase (D1522) alphabet stamps. The papers and compliments are from the Chantilly range. The camera comes from the On Holiday stamp set (C1572)
The strip of sentiments on the right was created using phrases from 10 different stamp sets I own. Start with a 4" x 5" block and arrange the sentiments to fill it. Stamp the complete design onto scrap paper,

Remove two thirds of the sentiments and stamp what's left onto the cardstock.

Add some sentiments back onto the block and remove the ones you've already stamped. Use your first stamped image as a reference for placement and spacing. Change inks and stamp again. Repeat for a third colour. Then create a new 4" x 5" arrangement and repeat the process to create a unique design that reflects the content of the album.


This layout is taken from the Half & Half tags design on page 86 of Reflections How To book. I love the ideas in this book - the basic designs are very simple and you can dress them up anyway you desire. My sponge daubers got a work out on all the plain cardstock elements of the page. I just love the soft edge this creates. The final touch was some faux stitching created with ink and the Stitch Wonder Stamp Set (C1564)
The tags on the left were cut using the Artbooking Cricut cartridge and Glamour Uppercase (D1537) & Glamour Lowercase (D1522) alphabet stamps. The papers and compliments are from the Chantilly range. The camera comes from the On Holiday stamp set (C1572)
The strip of sentiments on the right was created using phrases from 10 different stamp sets I own. Start with a 4" x 5" block and arrange the sentiments to fill it. Stamp the complete design onto scrap paper,

Remove two thirds of the sentiments and stamp what's left onto the cardstock.

Add some sentiments back onto the block and remove the ones you've already stamped. Use your first stamped image as a reference for placement and spacing. Change inks and stamp again. Repeat for a third colour. Then create a new 4" x 5" arrangement and repeat the process to create a unique design that reflects the content of the album.

Categories
- Cards (64)
- Stamping (109)
- Thin Cuts (49)
- Photo Organisation (1)
- Album Planning (1)
- Scrapbook Layouts (244)
- Stamp of the Month (91)
- Paper Craft (11)
- Paper Fundamentals (17)
- Simple pages (2)
- Washi Tape (8)
- Flip Flaps (11)
- Tools (16)
- PML (4)
- Organisers (3)
- stickers (6)
- Albums (7)
- Workshops (3)
- watercolour pencils (2)
- Watercolour paints (2)
- Workshops Your Way (34)
- Special Offers (39)
- Organise Your Photos (3)
- Craft with Heart (3)
- Storytelling (6)
- VIP (3)
- Shimmer Brush (1)
- Glitter Paper (1)
- Paper Candy (2)
- Interactive Cards (1)
- Metallic Markers (1)
- Tell Your Story (2)
- Distress Oxides (2)
- Nearly Bare Pages (1)
- Wedding (2)
- Stencils (1)
- Free download (2)
- Organisation (1)
- Same but Different (1)

4 comments
Leave a comment