Spruced Up Australasian CTMH Blog Hop

Welcome to the CTMH Australasian Spruced Up Blog Hop. This hop features the artwork of some talented women from across Australia and New Zealand.
If you arrived from Lauren’s Blog you are in the right place. If this is your first time on a blog hop simply read on and enjoy my creations. If you like what I show today, please subscribe to my blog, leave a comment on this post or share it on social media. Then you click on the link at the end of this post and it will take you to the next blog and so on and so on. Easy and fun! Best part- you can see several different projects you can create with Close To My Heart’s Spruced Up collection! When you land back here, you are done and it’s time to hit the scrapbook room for some crafting fun.


The Spruced Up Collection is versatile
Don’t be fooled by the wintery, woodsy feel to this kit. It is brilliant for lots of everyday photos down under too. The earthy colours team well with many landscapes and add a subtle backdrop for images featuring brighter colours. I’m sure you will be impressed with the variety of ideas shared on this hop.
The Spruced Up collection is available until the end of February, 2020. Buy it as a full kit or purchase individual items. Ask your Close To My Heart Consultant for details.
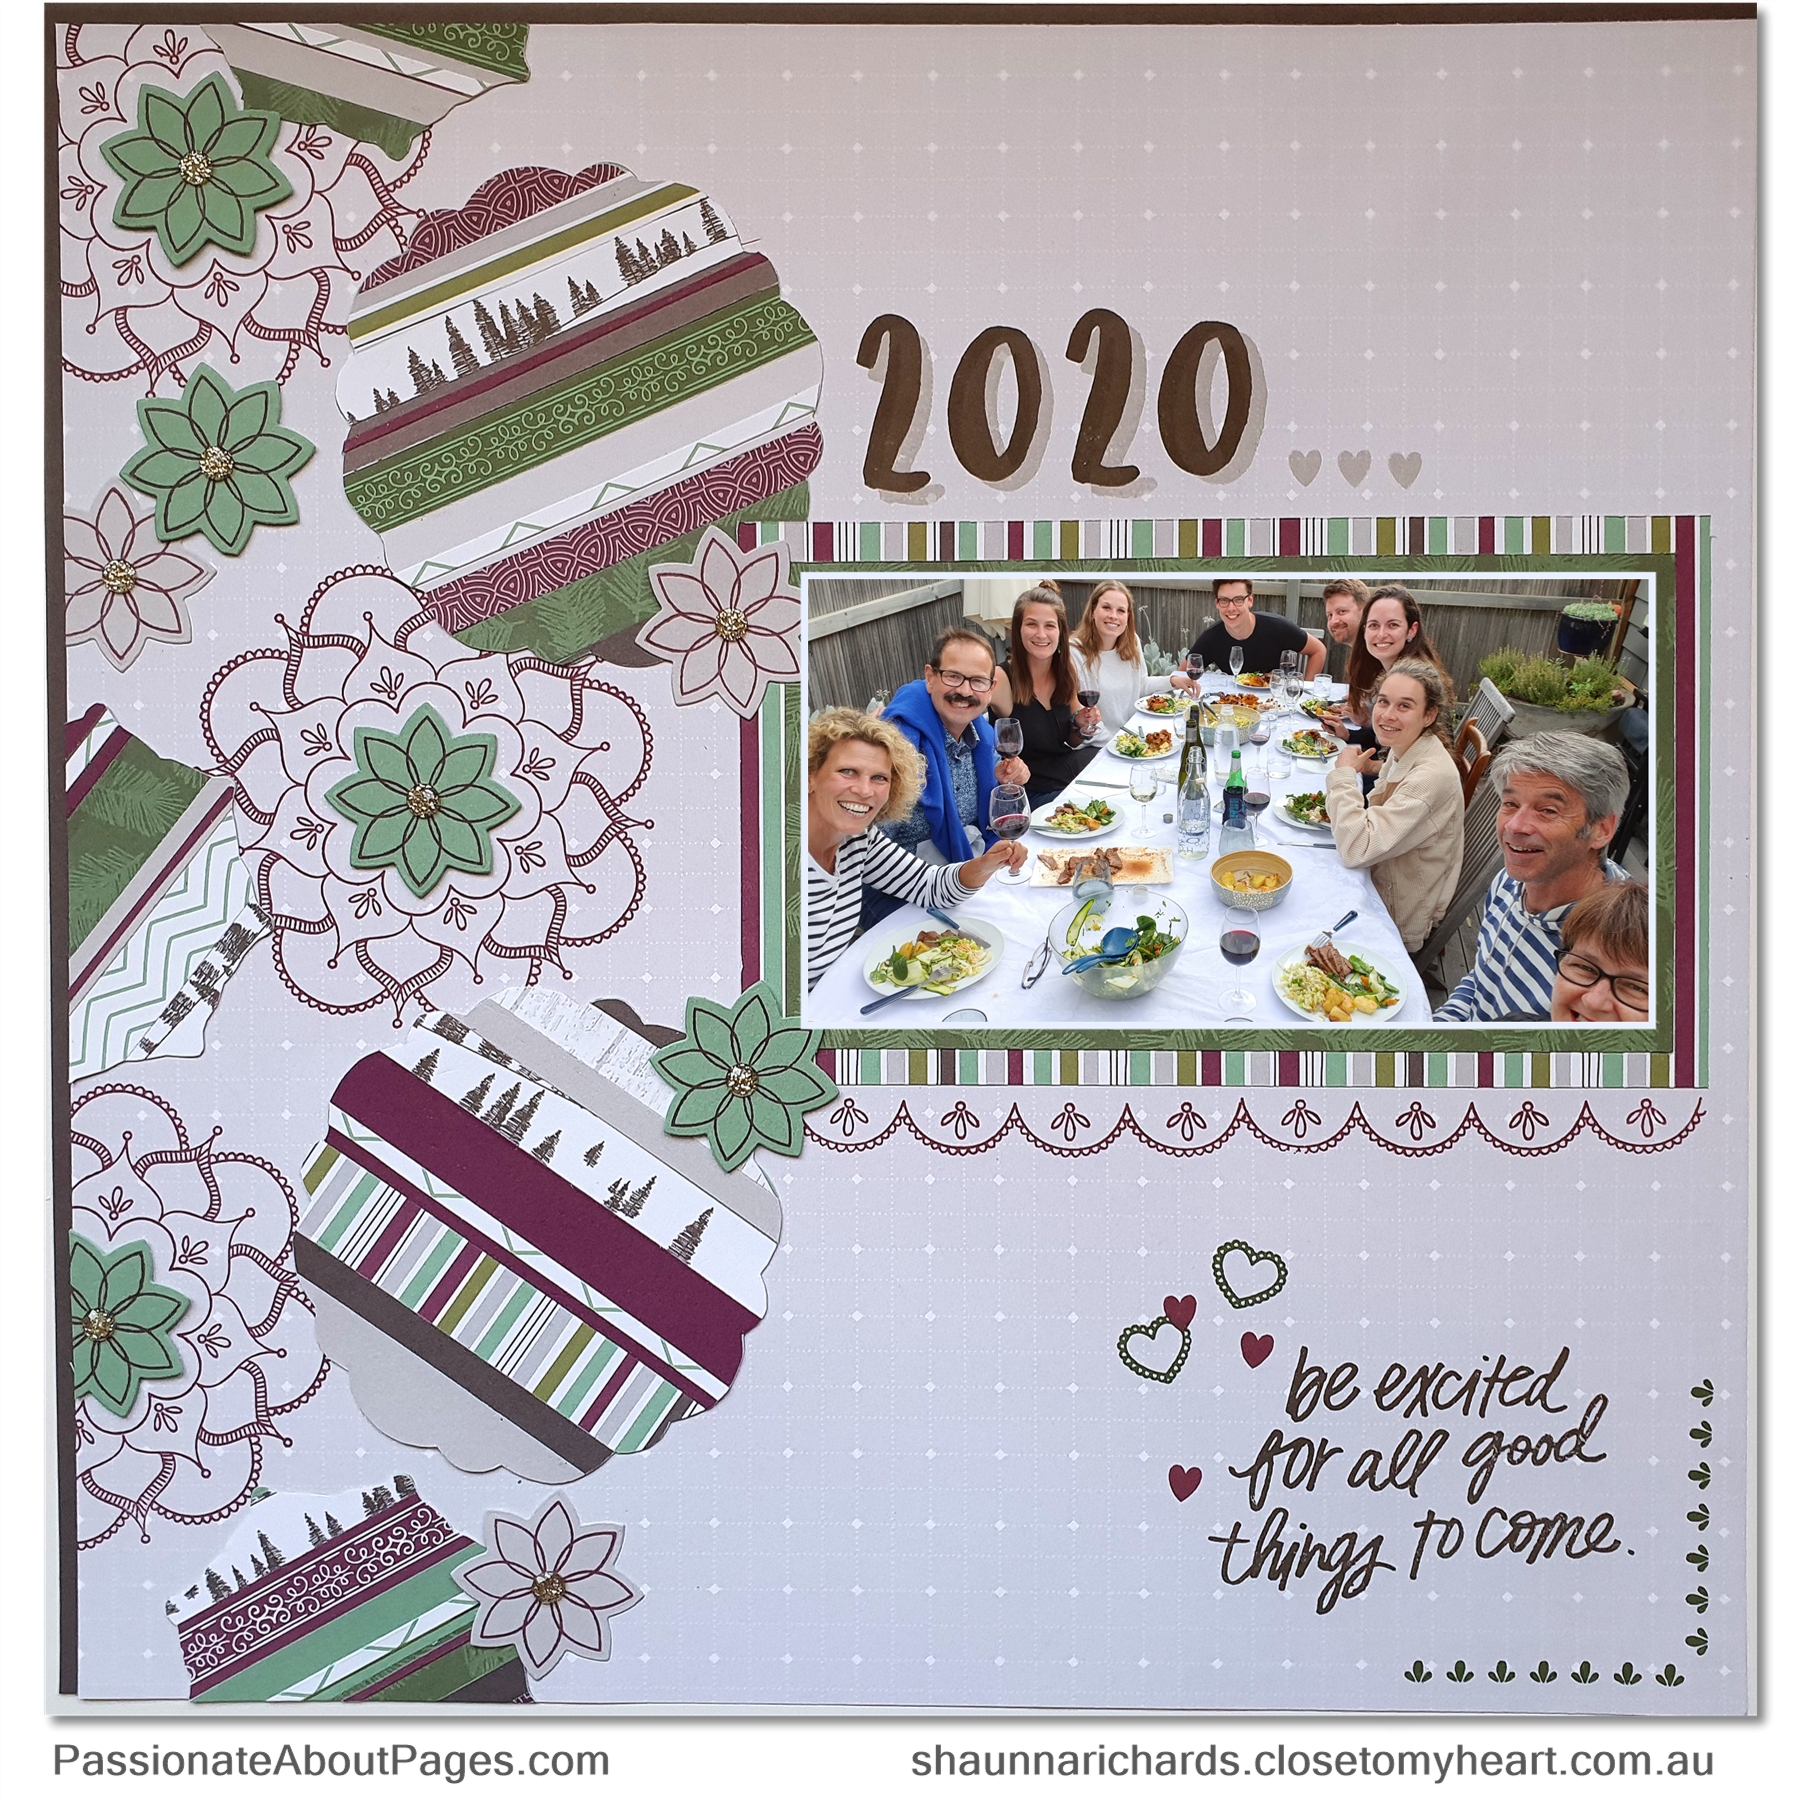
Make use of your scrapbooking scraps
I have enjoyed using this collection so much that I only had very small scraps leftover when it came time to make my sample for today’s blog. I had just watched a sewing video about creating new fabric from lots of skinny strips and decided to try it with my paper and sticker scraps. My first instinct was to reach for Basic Shapes Thin Cuts BUT my order arrived as I was experimenting and this gorgeous set, Mandela Vibes, was in the box!
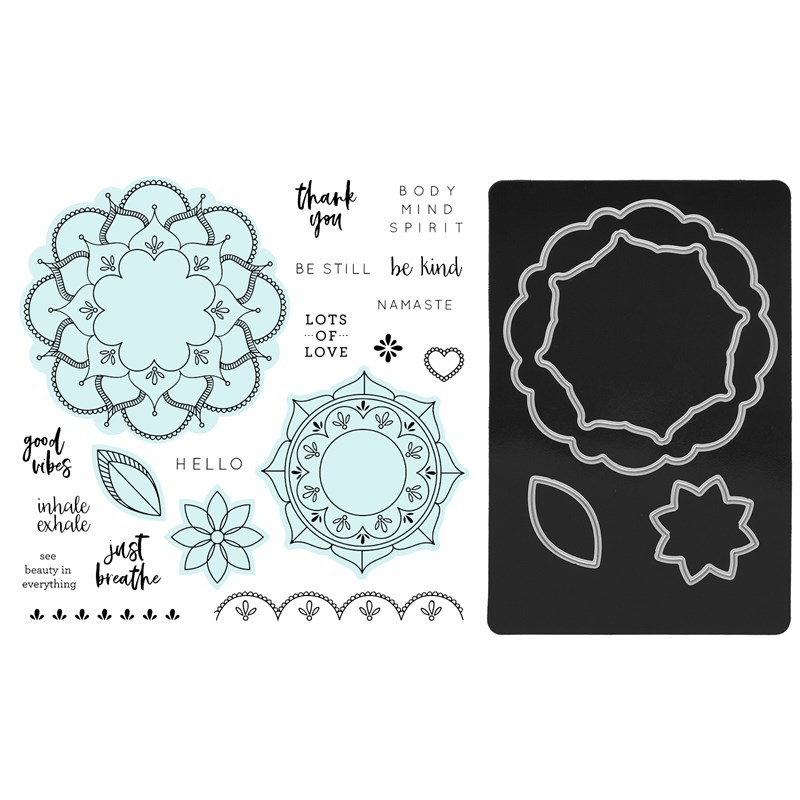
I love the scallop shapes of the two large dies and cut several to use as bases. Then it’s simply a matter of laying narrow strips (¼”up to ¾”) over the shape. Begin near the centre, adding glue to the base and work out. Liquid glue ensures all strips are stuck right to the edges of the base shape. Then, flip the shape over and fussy cut the overhanging paper away. Your die cut machine may be able to cut through both layers if you make a piece of striped ‘paper’ first – I just didn’t think about that at the time.

Create a free flowing border for your page
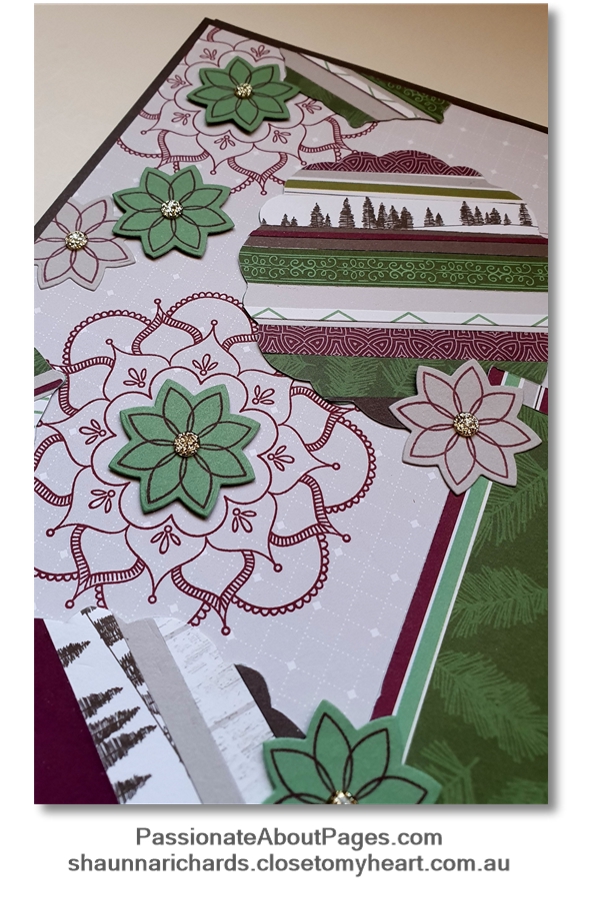
The shapes made were quite ‘heavy’ on the page. To lighten the look of the design, I stamped the co-ordinating Mandela Vibes stamp directly to the base page using Sangria Ink. The base paper comes from the Jan/Feb Mix In paper packet. As the name suggests, these packs are designed to blend well with the other collections featured in the catalogue, making it easier to use up your leftovers.
Finish off this border cluster by adding the small flower shapes from the Mandela Vibes set with Gold Glitter Gems for centres. The Julep flowers are mounted with Foam Dots
Create a scrapbook title in two parts
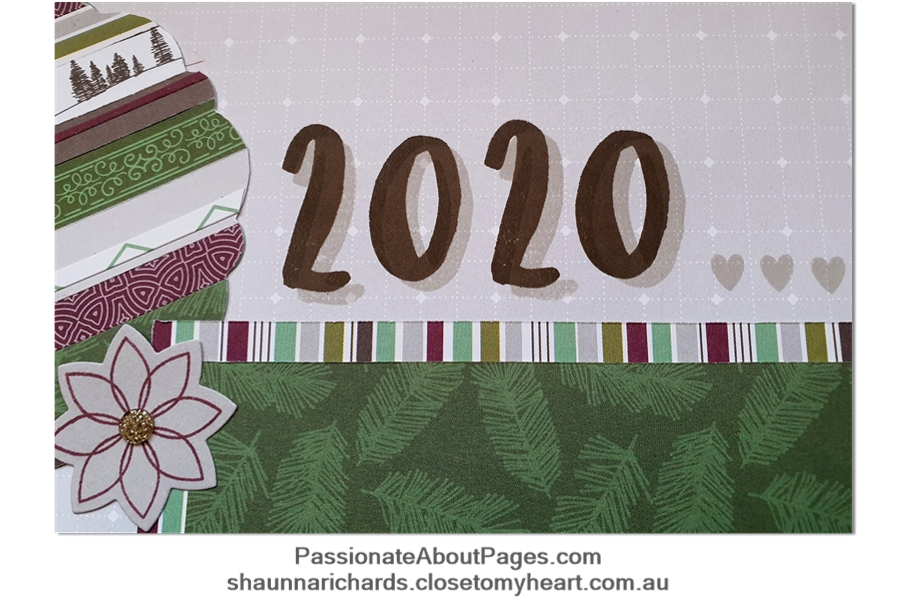
It is fun to mix sentiment stamps with alphabets to create interesting titles. This page is the title page for my 2020 album. There are exciting times ahead for us this year and I wanted to express that in the title. First up, the date was created using a shadow stamping technique. Stamp first in Mink Ink and then in Espresso ink, moving slightly to the left and up so the Mink looks likes a shadow. Love is in the air this year so … was replaced by 3 little hearts from January’s stamp of the month, Everyday Magic.
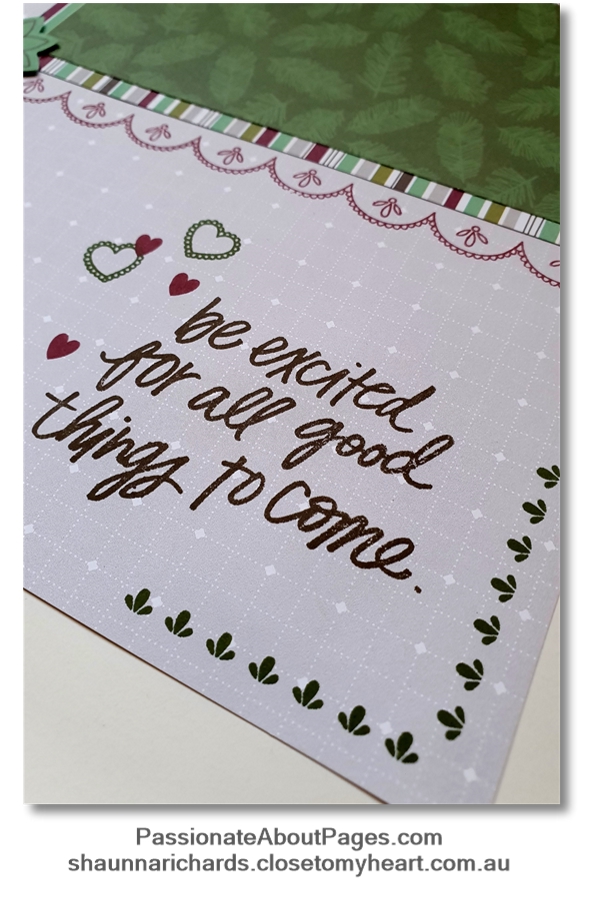
The second part of the title appears in the bottom right of the page. This creates visual balance with the Espresso cardstock border I added to the top and left of base paper. The sentiment, “be excited for all good things to come” is ideal for a new year. The corner design and hearts around this sentiment come from Everyday Magic and Mandela Vibes.
Make your photo mat stand out
This group photo shows the first of many celebrations we will enjoy this year. It was wide and narrow so I need to jazz up the photo mat to help it stand out on the page. A double mat of printed paper helped and printing the photo with a white border makes it stand out but it still looked too narrow. Another look at the Mandela Vibes stamp set, gave me my solution – the beautiful scalloped edge stamp adds depth to the photo mount and completes the page.

Order your supplies this month
The Spruced Up collection, January Stamp of the Month and the Mandela Vibes Stamps & Thin Cuts are available to purchase from your Close To My Heart consultant until the end of February when they retire. A list of products used on my layout appears at the end of this post. Place your order on my website or with your Close To My Heart Consultant.
I’d love you to leave a comment for me before you go. Then click on the underlined link and move on to Dannii’s blog, Scrappy Chicks, to see the project she has designed for you.
Happy Scrapping,
Shaunna
Close To My Heart products used in this project
X7253S Spruced Up Paper & Sticker Pack
X7253C Spruced Up Coordinating Cardstock
X9011 Mix In Paper Pack
S2001 Every Day magic (Stamp of the Month)
Z3640 Mandela Vibes Stamp & Thin Cuts
Z3312 Gold Glitter Gems
Z6516 Sangria Exclusive Ink
Z2829 Espresso Exclusive Ink
Z2835 New England Ivy Exclusive Ink
Z3441 Dual Tip Multi Bond Glue Pen
Z1836 Non-stick Micro-tip Scissors
Z3341 Thin Foam Dots
Z3326 Permanent Adhesive Tape
Categories
- Cards (64)
- Stamping (109)
- Thin Cuts (49)
- Photo Organisation (1)
- Album Planning (1)
- Scrapbook Layouts (244)
- Stamp of the Month (91)
- Paper Craft (11)
- Paper Fundamentals (17)
- Simple pages (2)
- Washi Tape (8)
- Flip Flaps (11)
- Tools (16)
- PML (4)
- Organisers (3)
- stickers (6)
- Albums (7)
- Workshops (3)
- watercolour pencils (2)
- Watercolour paints (2)
- Workshops Your Way (34)
- Special Offers (39)
- Organise Your Photos (3)
- Craft with Heart (3)
- Storytelling (6)
- VIP (3)
- Shimmer Brush (1)
- Glitter Paper (1)
- Paper Candy (2)
- Interactive Cards (1)
- Metallic Markers (1)
- Tell Your Story (2)
- Distress Oxides (2)
- Nearly Bare Pages (1)
- Wedding (2)
- Stencils (1)
- Free download (2)
- Organisation (1)
- Same but Different (1)

16 comments
Leave a comment