S2106 Outdoor Borders Stamp of the Month Blog Hop
Whether it’s celebrating time spent enjoying the sunshine or getting back to nature, these border stamps are perfect for your scrapbook layouts. Create accents and full 12” borders from this set.

I’m delighted you’ve joined the Outdoor Borders Stamp of the Month Australasian Blog Hop. This is a circular hop. If you arrived from Doris’ blog, Creative Inspiration, you are in the right place. Simply read through this post and click on the link to the next blog at the end of it. Keep reading and ‘hopping’ until you find yourself back where you started from. Each blog will showcase a project featuring the Outdoor Borders (S2106) stamp set which is June’s Stamp of the Month from Close To My Heart.
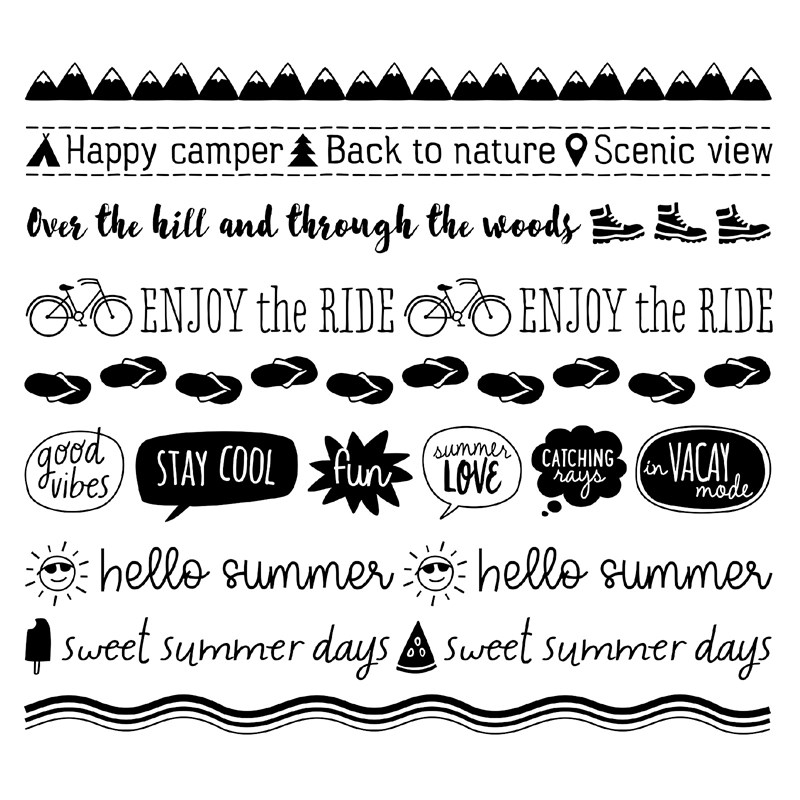
9 great outdoor border designs to choose from
This little stamp set covers a whole lot of photo themes – summer, beach fun, swimming, fruity treats, cycling, hiking, camping and enjoying the mountains. Many of the sayings can also apply to your day to day photos of family and friends. The speech bubbles are perfect for this.
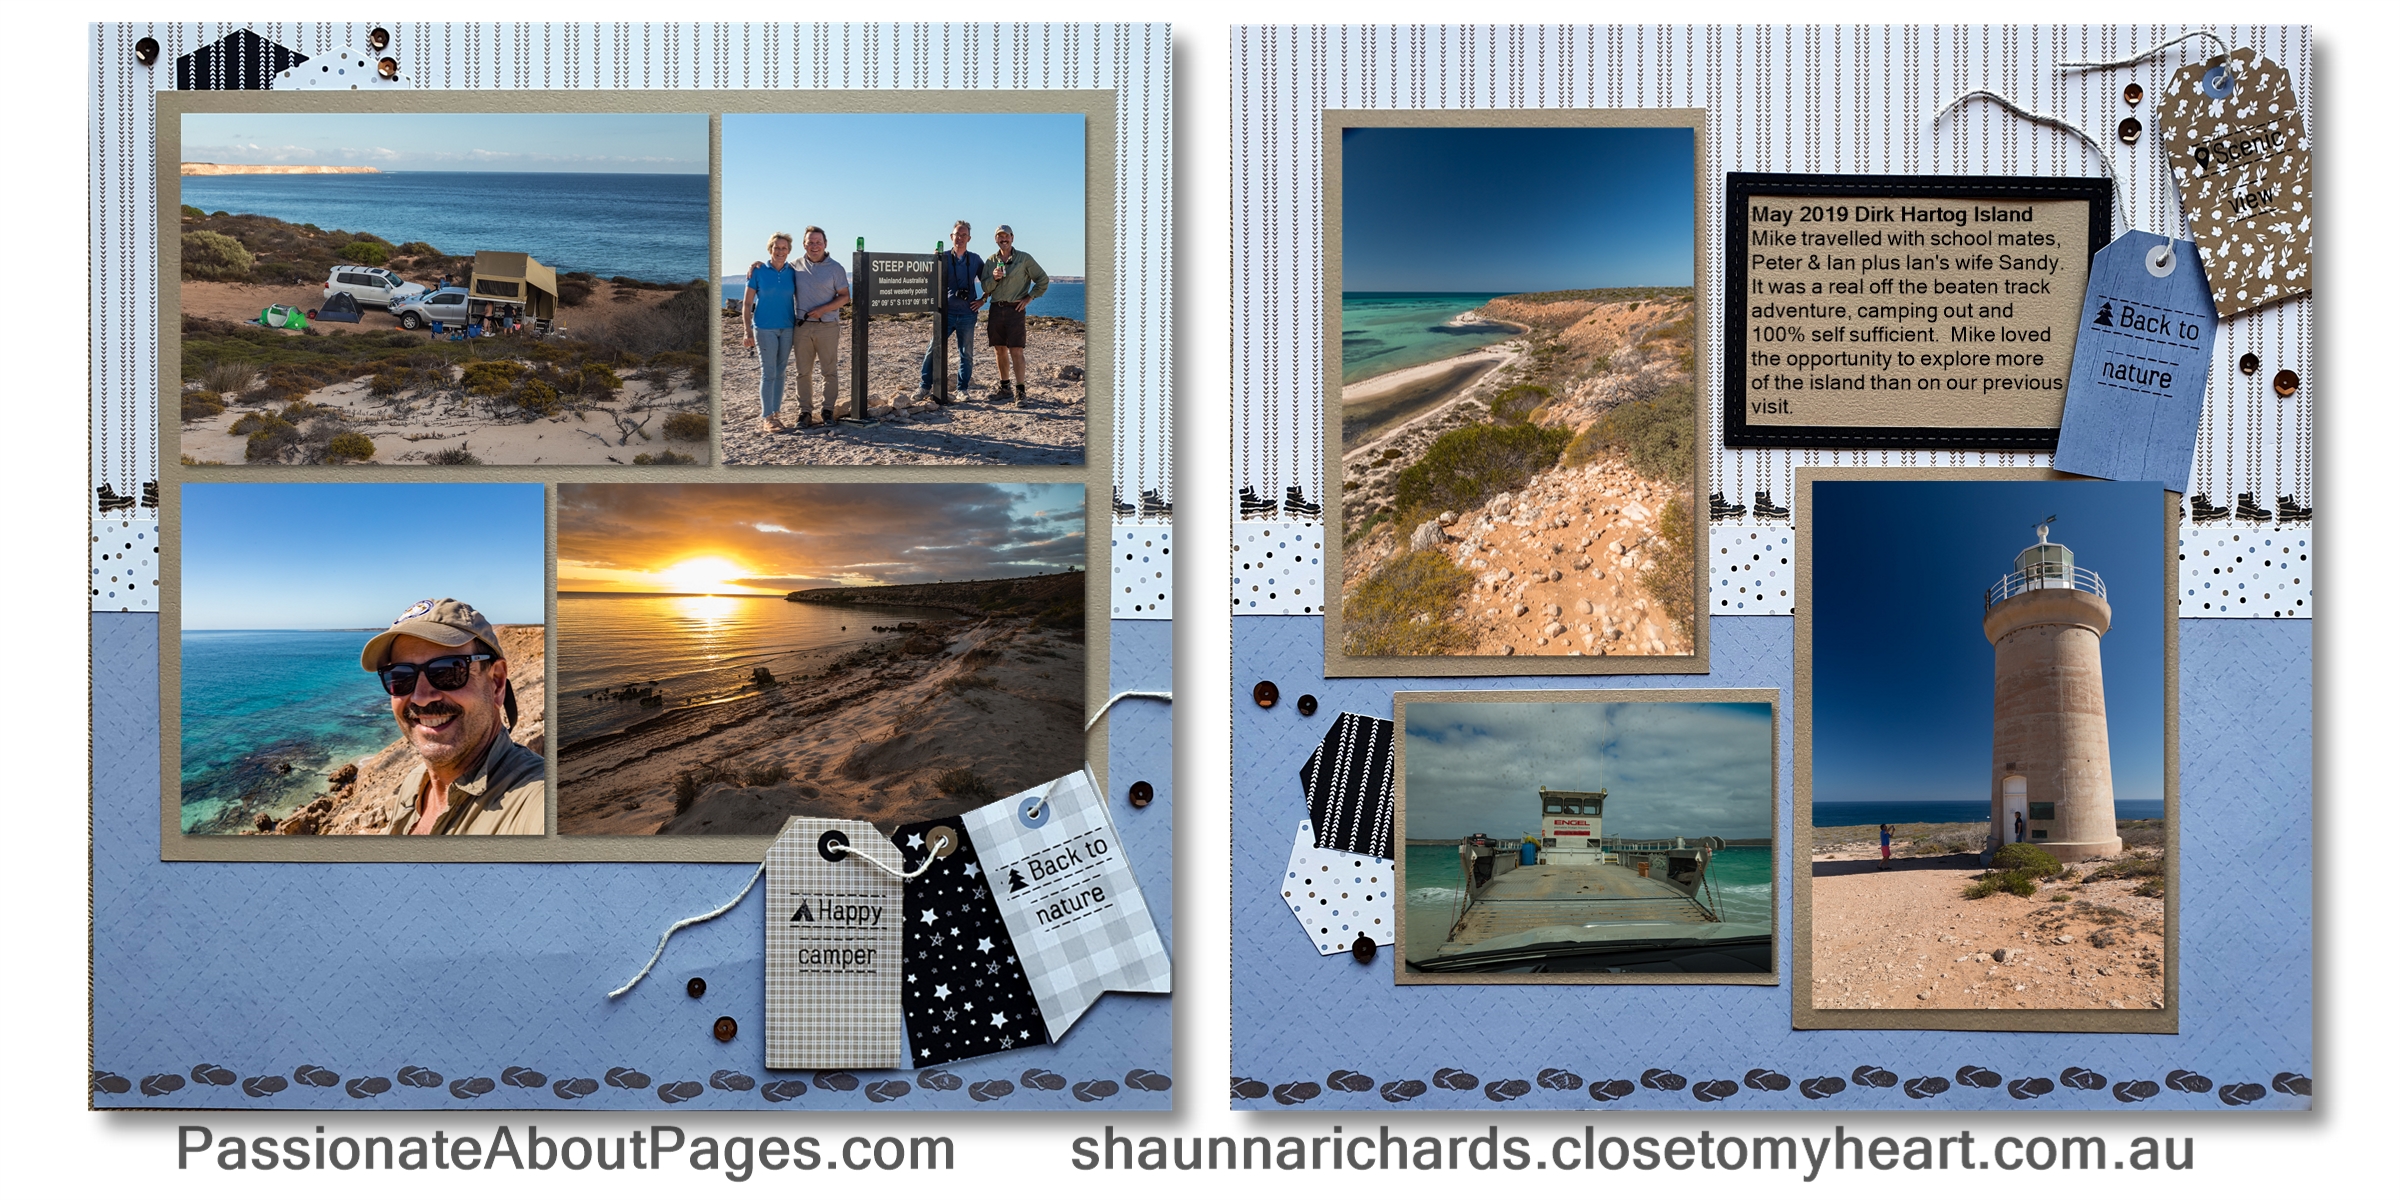
Create a half and half layout
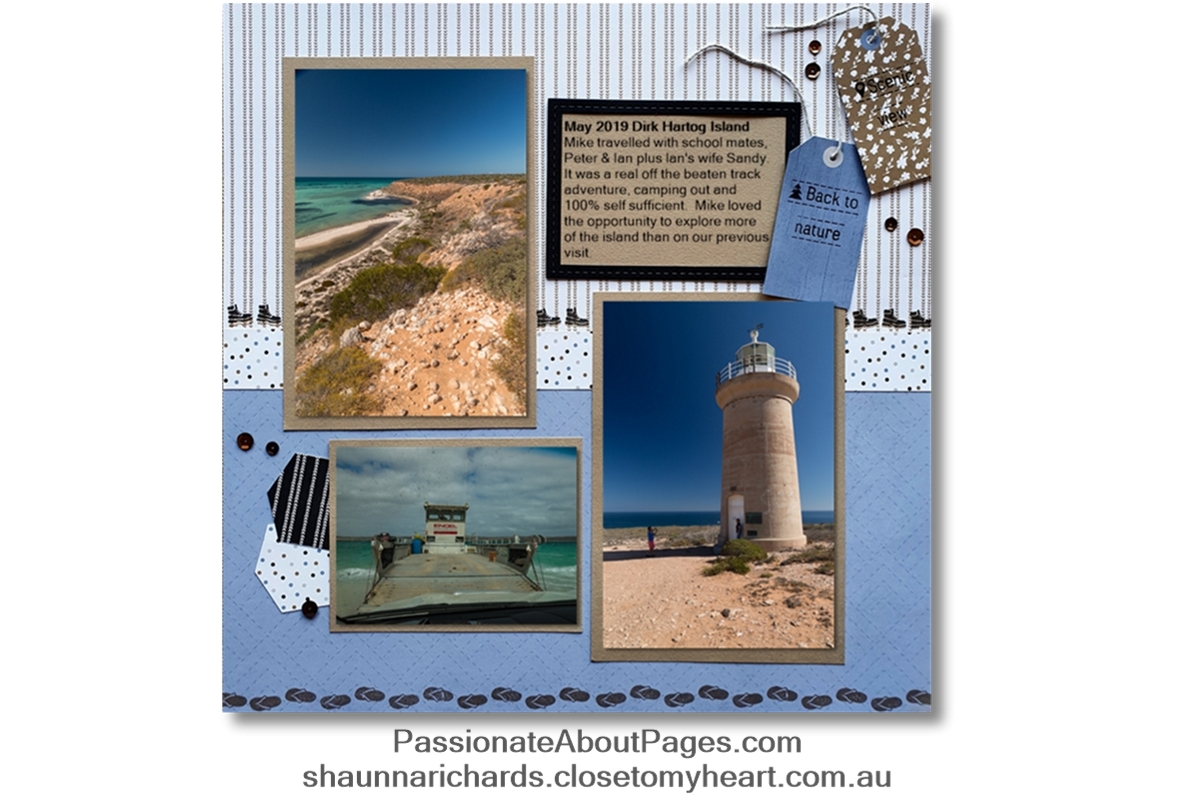
This layout has no base page under the printed papers. This makes it more economical and lighter in your album. To create this look, simply choose 2 papers and cut each of them into 6” x 12” pieces. Arrange as shown and then cut two, 1” strips from a third co-ordinating print and glue this so it holds the other two pieces together. I prefer to use liquid adhesive for this job as you can easily glue the full 12” of the strips.
My papers come from the May-Jun Mix In paper pack. I’ve also used the toffee and black cardstock from the Mix In co-ordinaing cardstock pack. You will find a full page of cut apart tags in the Mix In pack too. This made it super easy to embellish my layout.
Mask and stamp portions of the border stamp.
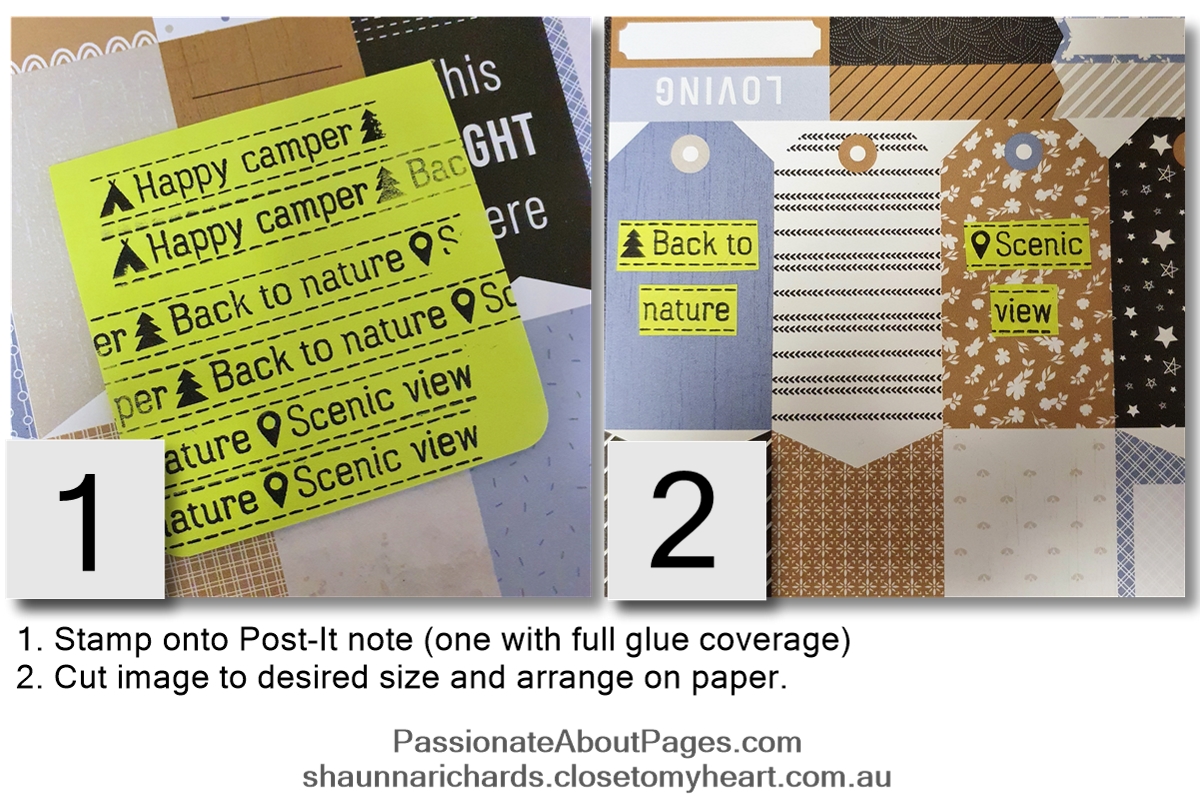
I wanted to add a few phrases to some of the tags. Here’s how I did it…
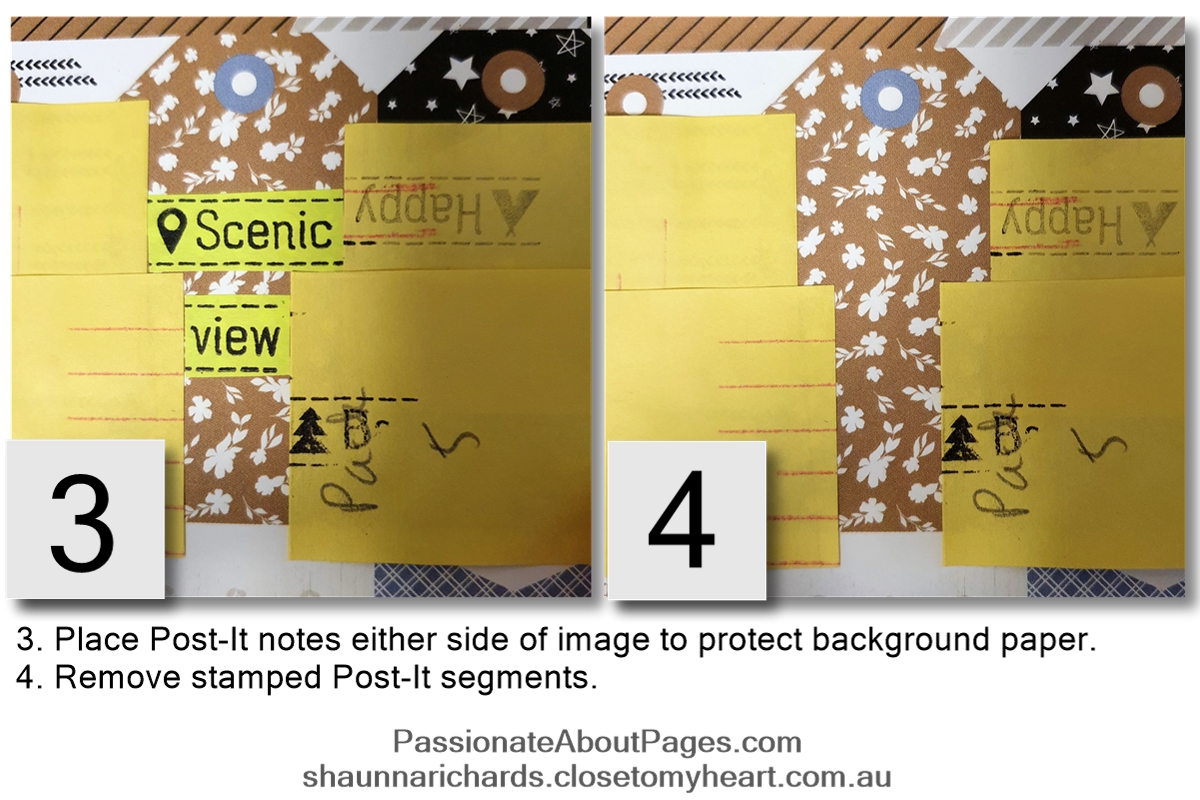
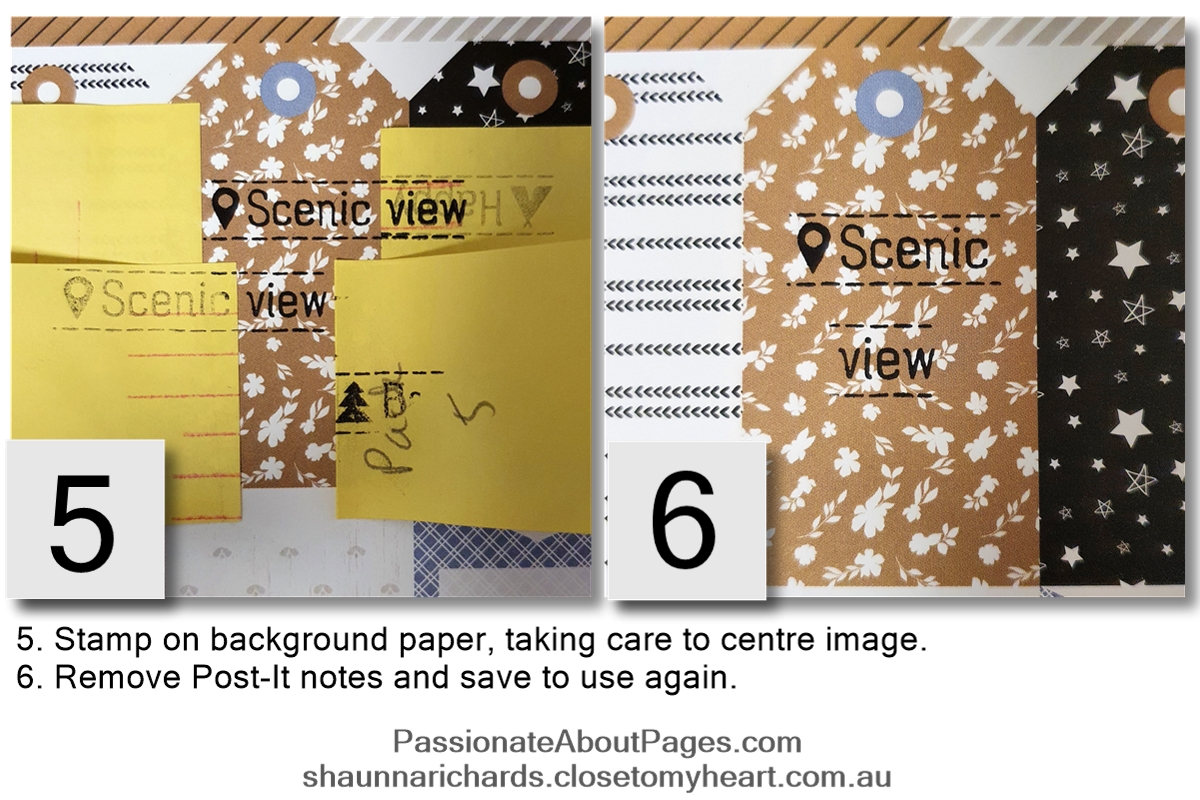
Stamp 12” borders
The thongs at the bottom of the layout were easily stamped in toffee ink by beginning on one side and moving the stamp across until the full width was filled.
The hiking boots border took a little more work as that stamp also includes a phrase. I decided the easiest solution was some stamp surgery. I simply cut the stamp between the words and the boots. If I ever need to use them together I can just position both on one block.
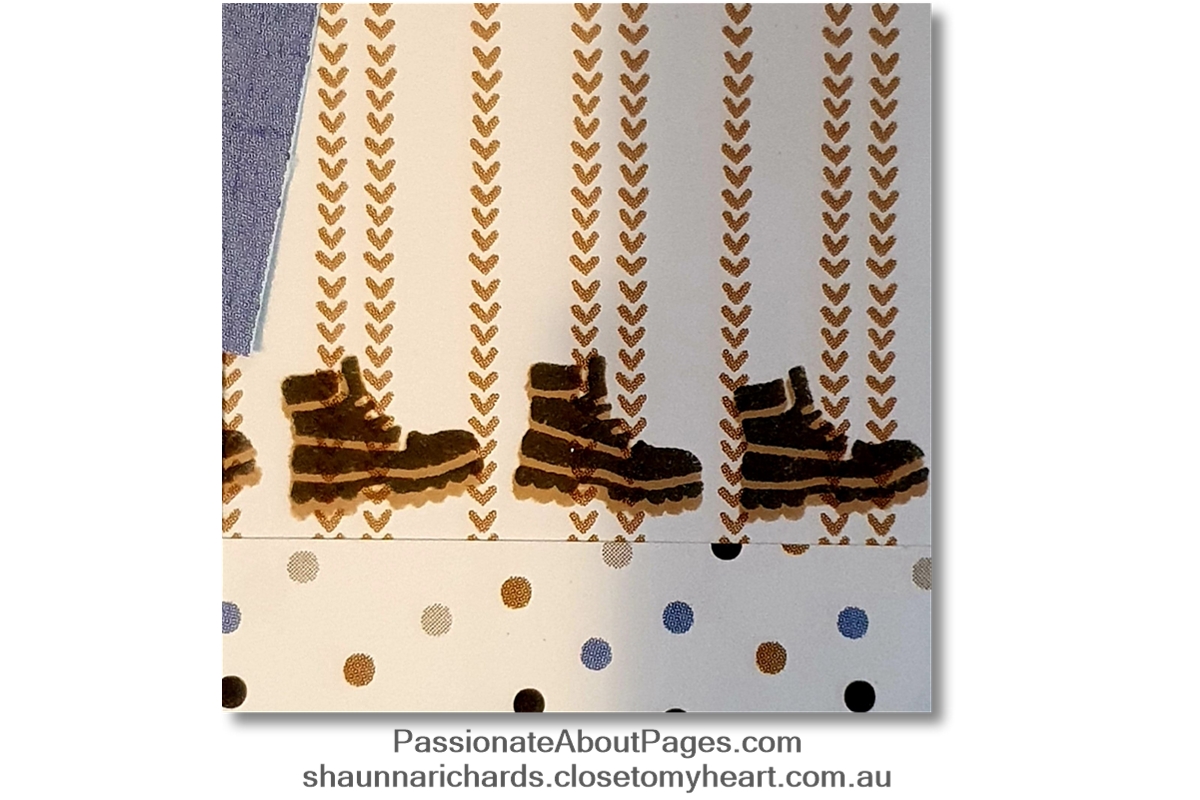
I stamped first in toffee ink again but it didn’t really show on the striped paper. I re-stamped, slightly higher than the first time, using black ink and this created a fun two tone look for the boots. I love it when something great comes from a mistake!
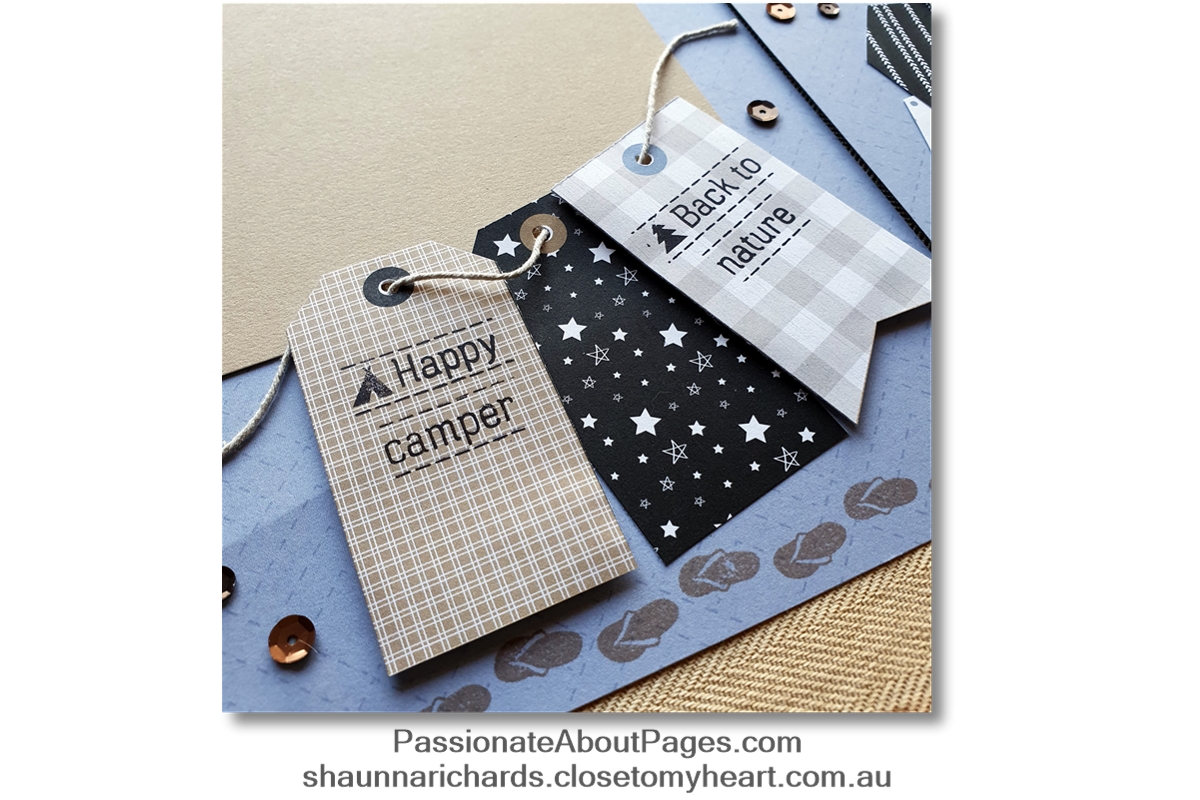
Add tags and string for focal points
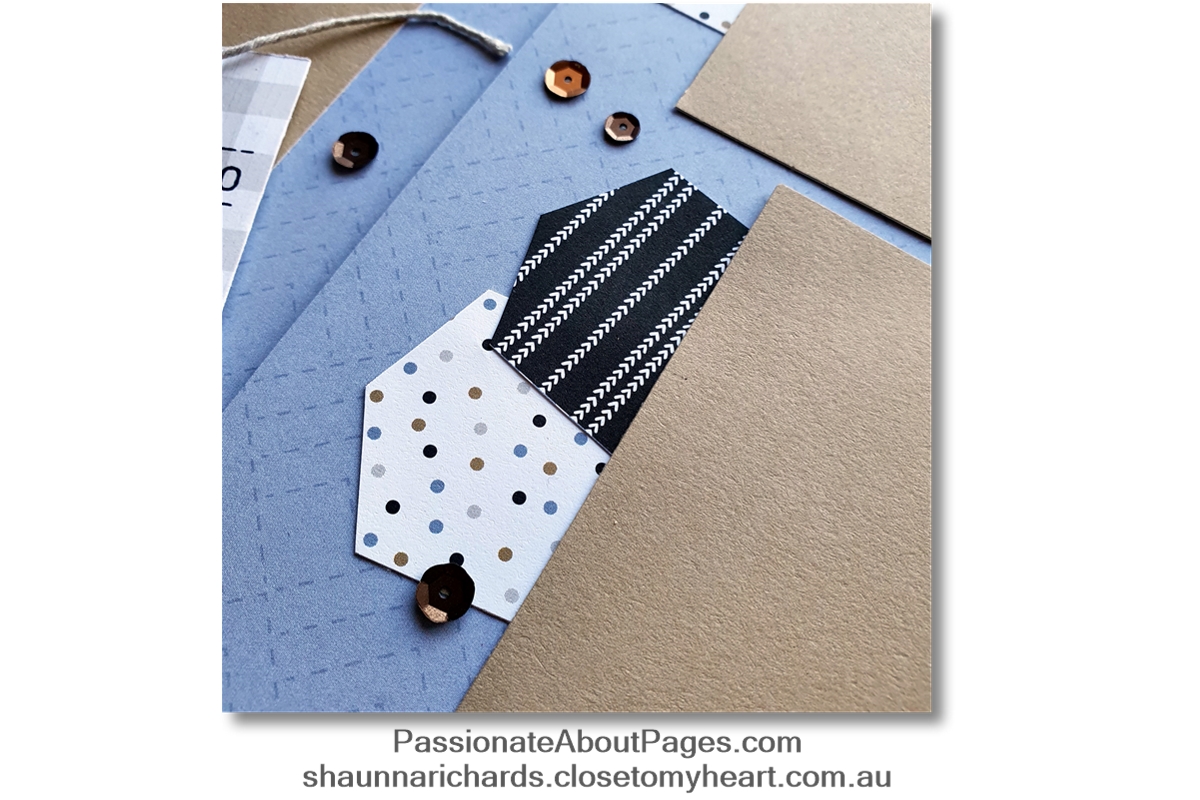
Keeping the ‘Visual Triangle’ in mind, I added some of the cut apart tags on the top two outer corners and the lower centre corners of each page. This frames your page and draws the viewer’s eyes into the photos.
Use a 1/8” hole punch on the tags and thread string through them. Attach string in a wavy shape using micro glue dots rolled to be nice and narrow. Then pop some of the tags up on foam tape, sprinkle some sequins and you are done.
Help your story stand out
Cut a frame for your journaling using the Stitched Rectangle Frames Thin Cuts. Type your story on the computer with a text box sized to fit the frame and print it on cardstock. The black frame is a nice balance with the black tags.
Order your Stamp of the Month
Outdoor Borders (S2106) is only available during June, 2021. Full retail price is $34 but VIP’s can have this versatile set FREE when accompanied by an $80 order. If you are not a VIP, you will pay $9 with a qualifying order. But seriously…check out Close To My Heart’s VIP program first! Place your order with your Close To My Heart Consultant.
Thanks for visiting! I’d love you to leave a comment or share the post with a crafty friend before you click on the underlined link and move on to Dannii’s Blog, Crafty Chicks. I’m sure you will like what she has to show us.
A list of the products used on this project follows. All items are available to purchase from your Close To My Heart Consultant. If you don’t have a consultant, this link will take you to my website.
Happy Scrappin’
Shaunna
CTMH products used in the Project
S2106 Every Thank You Stamp Set
X9028 Mix In Paper Pack
X9029 Mix -In Co-ordinating Cardstock
Z3687 Stitched Rectangle Frames Thin Cuts
Z2805 Black Ink Pad
Z2828 Toffee Ink Pad
Y1005 1” x 6 ½” Block
Z3372 Adhesive Runner
Z2060 Thin 3D Foam Tape
Z2089 Micro Dots
Z3441 Dual Tip Multi-bond Glue Pen
Z1836 Non-stick Micro-tip Scissors
Unless otherwise stated within the post, this is my original work. Please feel free to use as inspiration for your own personal use, but do not use for publication, contest/message board entries, or to sell. If my work inspires a work of your own, please give credit by posting a link to my blog. Thank you!
About Shaunna
Shaunna Richards is the founder of Passionate About Pages, a business built on finding connections to help women keen to preserve their memories though photos, memorabilia and storytelling in traditional scrapbook albums.
Shaunna’s 20+ years in the scrapbooking industry coupled with her teaching background make her the perfect person to show you how it’s done.
Categories
- Album Planning (1)
- Albums (6)
- Cards (60)
- Craft with Heart (3)
- Flip Flaps (11)
- Organise Your Photos (3)
- Organisers (3)
- Paper Craft (11)
- Paper Fundamentals (17)
- Photo Organisation (1)
- PML (4)
- Scrapbook Layouts (235)
- Simple pages (2)
- Special Offers (38)
- Stamping (105)
- Stamp of the Month (90)
- stickers (6)
- Storytelling (6)
- Thin Cuts (49)
- Tools (16)
- VIP (2)
- Washi Tape (8)
- Watercolour paints (2)
- watercolour pencils (2)
- Workshops (3)
- Workshops Your Way (34)
- Shimmer Brush (1)
- Glitter Paper (1)
- Paper Candy (2)
- Interactive Cards (1)
- Metallic Markers (1)
- Tell Your Story (2)
- Distress Oxides (2)
- Nearly Bare Pages (1)
- Wedding (1)
- Stencils (1)
- Free download (1)
- Organisation (1)
- Same but Different (1)
3 comments
Lots of great ideas in this layout, Shaunna. This stamp set is perfect for these photos.
I love the titles you created. Great job.
Thanks Dannii they were fun to make
Leave a comment